How to Repair Mouse Double Click in 2025: Complete Logitech G304/G305 Fix Guide
Step-by-step guide to fix mouse double-click issues with our free online tester. Includes detailed Logitech G304/G305 repair walkthrough with photos.
What Causes Unwanted Double-Clicks?
If your mouse registers a double-click when you only press once, you're facing classic switch bounce. The fastest way to confirm it is to run a double click test and then choose the right fix.
- Worn micro-switch: The internal metal leaf bounces, sending two signals
- Dust/debris: Contamination around the button causes unstable contact
- Settings/firmware quirks: Rare, but aggressive polling or software can exaggerate bounce
Our double click tester measures the millisecond interval between events, so you can see whether a single press produced multiple signals.
Step 1: Confirm the Fault with a Double Click Test
- Go to the Start Test area on this page
- Click 10–20 times with the problem button
- If you see unexpected "Double-Clicks" or ultra-short intervals (e.g., 5–20 ms) when you intended one click, the switch is bouncing
- Run the double click test again after each fix below to verify progress
Quick Software Fixes (Try These First)
- Increase your OS double-click speed slightly
- Blow out dust around the button; keep the shell clean
- Update mouse firmware/drivers and reconnect the USB/dongle
- Temporarily reduce polling rate to test stability
- Disable macros, click-helpers, or third-party overlays that may simulate extra clicks
If the problem persists, move to the hardware repair.
Hardware Repair: Replace the Micro-Switch (Logitech G304/G305)
Most persistent cases require a simple micro-switch swap. It's an intermediate 25–45 minute job.
Tools & Parts
- PH0 screwdriver, plastic spudger, tweezers
- Compatible micro-switches (e.g., Omron D2FC-F-7N variants or Kailh GM 4.0/8.0—match pin layout and height)
- Optional: pre-assembled replacement switch boards for G304/G305 (no soldering)
Safety
Remove the battery, work on a non-conductive surface, and note that opening the shell may void warranty.
Photo Walkthrough
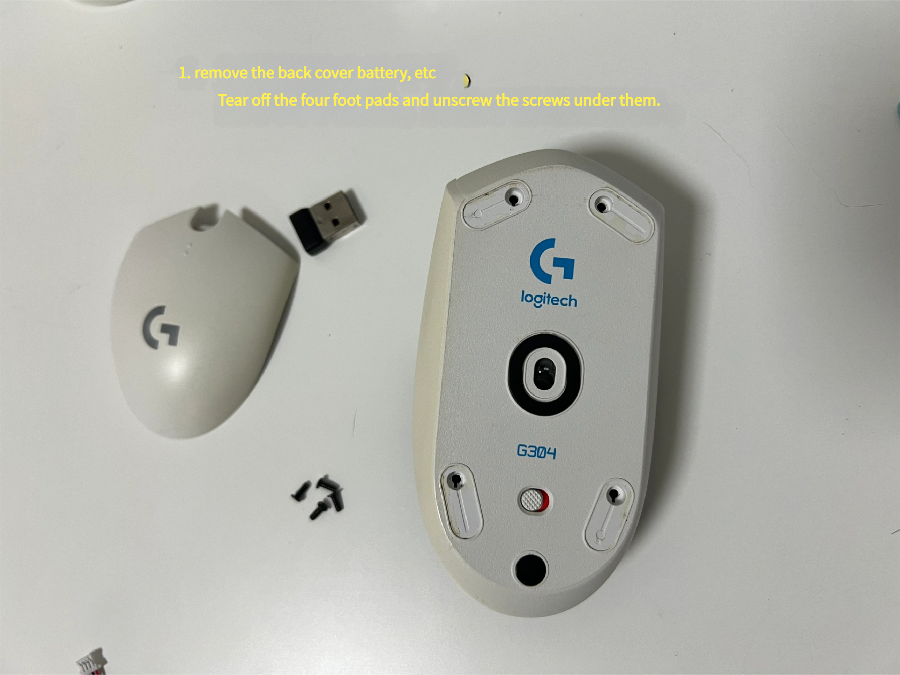
1) Remove feet and screws
Peel off the four skates/feet and unscrew the four hidden screws.
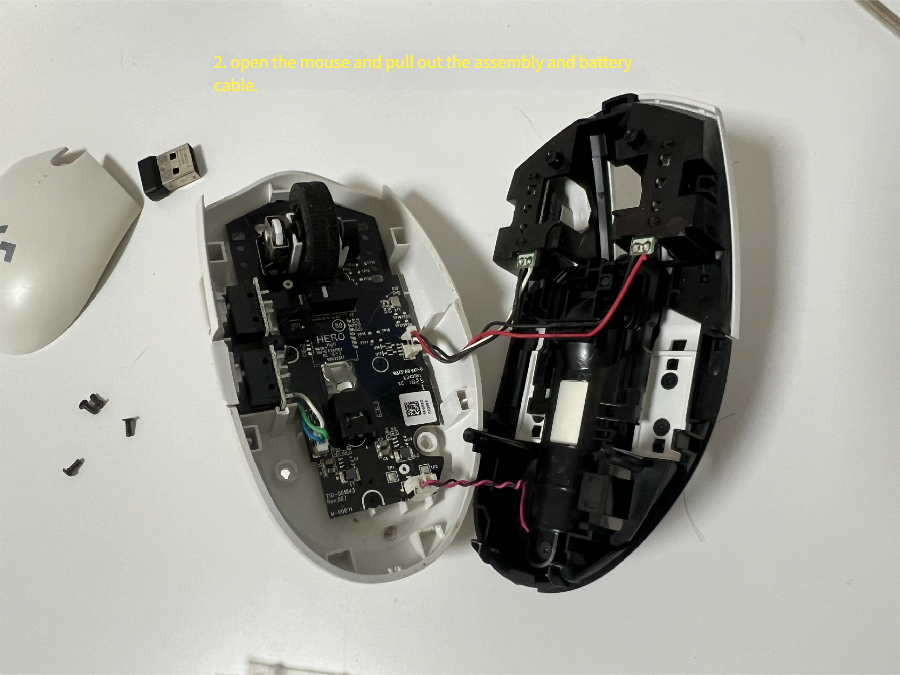
2) Open the shell and unplug the battery cable
Lift the top shell carefully and disconnect the battery/assembly lead.
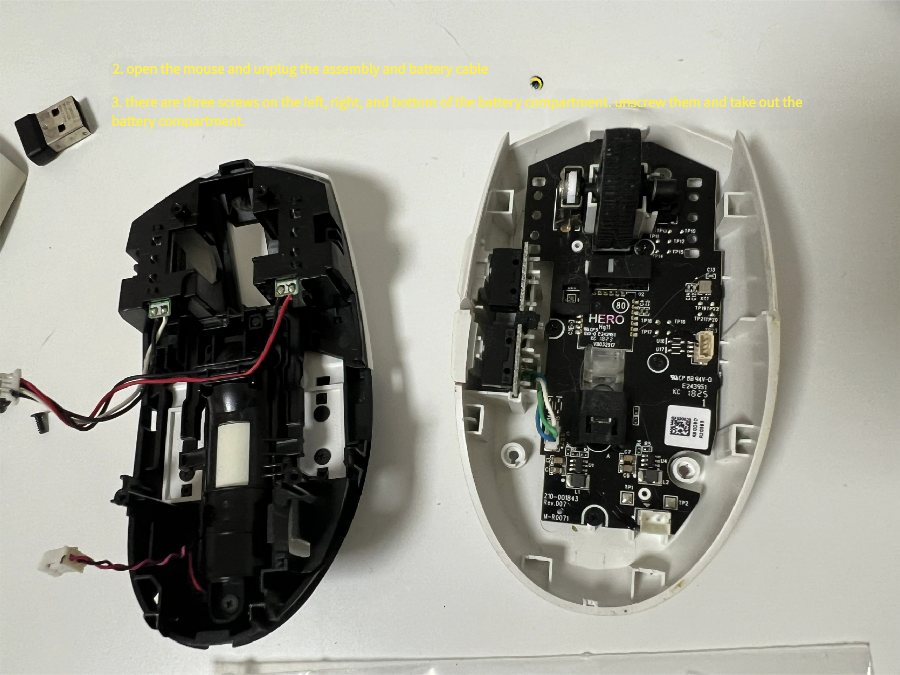
3) Take out the battery compartment
There are three screws around the battery module (left, right, bottom). Remove them and lift the module out.
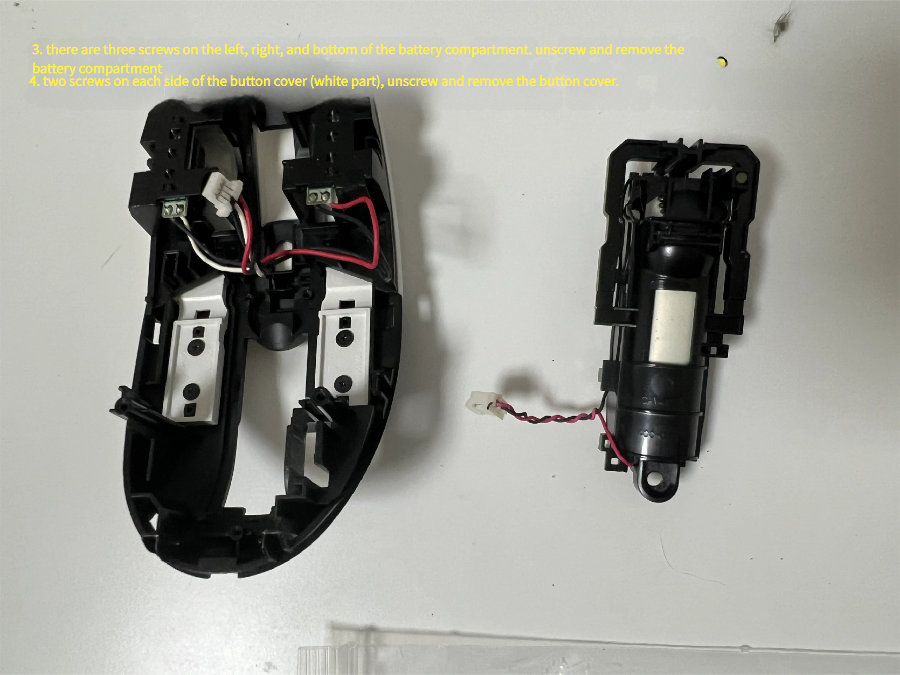
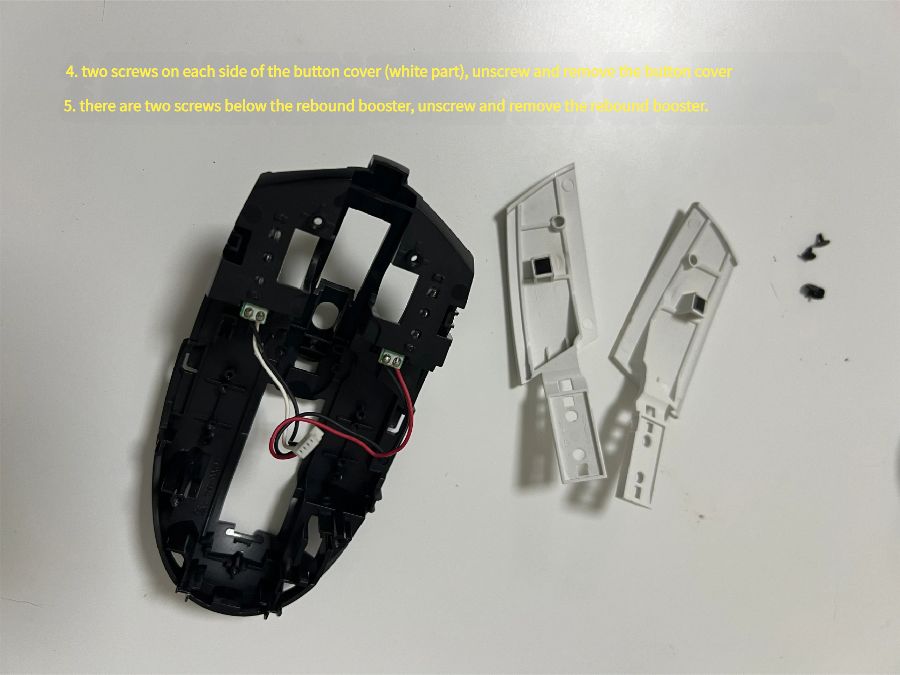
4) Remove the white button covers
Two screws per side hold the white button covers. Unscrew and remove them.
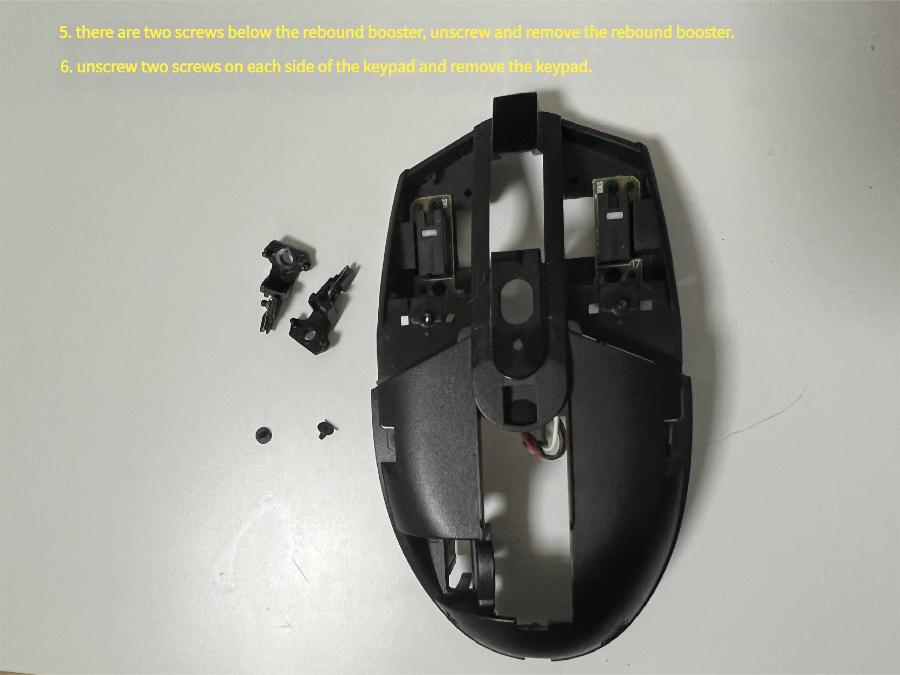
5) Remove the rebound boosters
Under each booster are two screws—unscrew and remove the parts.
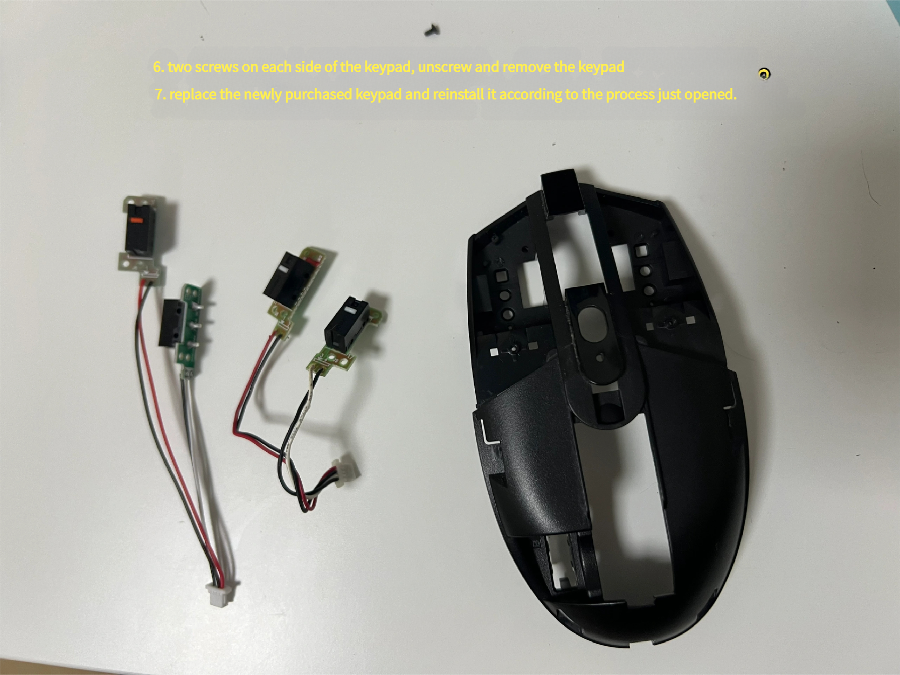
6) Free the switch/keypad boards
Each side has two screws. Unscrew and lift out the small PCBs that carry the micro-switches.
7) Install new switches or replacement boards
Using full replacement boards: drop-in and screw back.
Replacing bare switches: desolder the old units and solder in the new ones. Keep the same height and orientation so the button paddle actuates cleanly.
8) Reassemble in reverse
Switch boards → boosters → button covers → battery module. Reconnect the battery lead, close the shell, install the four bottom screws, and re-apply the skates.

Verify the Fix with the Double Click Tester
Return to the test area and click 20–30 times. A successful repair shows:
- Zero unexpected double-clicks
- Natural human timing between events
- Crisp, consistent button feel
If issues remain, re-seat the boosters, confirm switch height/orientation, or try a different switch model.
Frequently Asked Questions
Is there a free online double click tester for Logitech mice?
Yes—this page provides a double click tester compatible with G-series and MX Master models. It measures intervals in milliseconds and flags unwanted double-clicks.
How many clicks confirm a fault in a double click test?
Ten presses usually expose it; for borderline cases, run twenty. Any extra signal during a single press indicates a real problem.
Can I repair mouse double click without soldering?
If you buy pre-assembled G304/G305 switch boards, you can swap them with a screwdriver only. Bare switch replacement requires basic soldering.
Which micro-switch is best for repairing a double-click?
Common choices include Omron D2FC-F-7N variants and Kailh GM 4.0/8.0. Match pin layout and height to your original part.
Takeaways
- Start with an online double click test to quantify the problem
- Try fast software fixes first; many light cases improve immediately
- When needed, a micro-switch swap is the most reliable repair solution
- Always re-run the double click tester after each step to confirm success
Published by
Click Test Team